超声波雷达
1.1 项目介绍
蝙蝠飞行与获取猎物是通过回声定位的。回声定位:某些动物能通过口腔或鼻腔把从喉部产生的超声波发射出去,利用折回的声音来定向,这种空间定向的方法称为回声定位。科学家们从蝙蝠身上得到的启示发明了雷达,即雷达的天线相当于蝙蝠的嘴,而天线发出的无线电波就相当于蝙蝠的超声波,雷达接收电波的荧光屏就相当于蝙蝠的耳朵。
这一课我们就来学习制作一个简易雷达。将HC-SR04 超声波传感器、8002b功放 喇叭模块、共阴RGB模块和TM1650四位数码管模块组合实验,利用距离大小控制功放喇叭模块模块响起对应频率的声音、RGB亮起对应颜色,然后把这个距离显示在四位数码管上。这样就搭建好了一个简易的超声波雷达系统。
1.2 实验组件
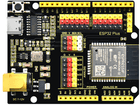
ESP32 Plus主板 x1
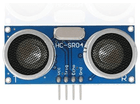
HC-SR04 超声波传感器 x1
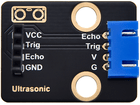
Keyes 超声波转接模块 x1
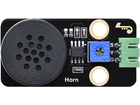
Keyes 8002b功放 喇叭模块 x1
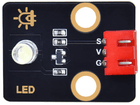
Keyes 共阴RGB模块 x1
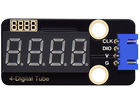
Keyes TM1650四位数码管模块 x1

XH2.54-3P 转杜邦线母单线 x1
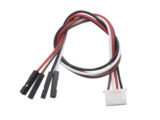
XH2.54-4P 转杜邦线母单线 x3
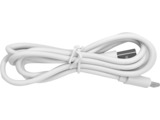
USB线 x1
1.3 模块接线图

1.4 在线运行代码
打开Thonny并单击1303,然后单击"此电脑"。
选中"D:\代码"路径,打开代码文件''lesson_33_Ultrasonic_radar.py"。
1
2
3
4
5
6
7
8
9
10
11
12
13
14
15
16
17
18
19
20
21
22
23
24
25
26
27
28
29
30
31
32
33
34
35
36
37
38
39
40
41
42
43
44
45
46
47
48
49
50
51
52
53
54
55
56
57
58
59
60
61
62
63
64
65
66
67
68
69
70
71
72
73
74
75
76
77
78
79
80
81
82
83
84
85
86
87
88
89
90
91
92
93
94
95
96
97
98
99
100
101
102
103
104
105
106
107
108
109
110
111
112
113
114
115
116
117
118
119
120
121
122
123
124
125
126
127
128
129
130
131
132
133
134
135
136
137
138
139
140
141
142
143
144
145
146
147
148
149
150
151
152
153
154
155
156
157
158
159
160
161
162
163
164
165
166
167
168
169
170
171
172
173
174
175
176
177
178
179
180
181
182
183
184
185
186
187
188
189
190
191
192
193
194
195
196
197
198
199
200
201
202
203
204
205
206
207
208
209
210
211
212
213
214
215
216
217
218
219
220
221
222
223
224
225
226
227
228
229
230
231
232
233
234
235
236
237
238
239
240
241
242
243
244
245
246
247
248
249
250
251
252
253
254
255
256
257
258
259
260
261
262
263
264
265
266
267
268
269
270
271
272
273
274
275
276
277
278
279
280
281
282
283
284
285
286
287
288
289
290
291
292
293
294
295
296
297
298
299
300
from machine import Pin, PWM
import utime

### TM1650的定义
ADDR_DIS = 0x48  #mode command
ADDR_KEY = 0x49  #read key value command

### 亮度的定义
BRIGHT_DARKEST = 0
BRIGHT_TYPICAL = 2
BRIGHTEST      = 7

on  = 1
off = 0

### number:0~9
NUM = [0x3f,0x06,0x5b,0x4f,0x66,0x6d,0x7d,0x07,0x7f,0x6f]
DIG = [0x6e,0x6c,0x6a,0x68]
DOT = [0,0,0,0]

clkPin = 22
dioPin = 21
clk = Pin(clkPin, Pin.OUT)
dio = Pin(dioPin, Pin.OUT)

DisplayCommand = 0

def writeByte(wr_data):
    global clk,dio
    for i in range(8):
        if(wr_data & 0x80 == 0x80):
            dio.value(1)
        else:
            dio.value(0)
        clk.value(0)
        utime.sleep(0.0001)
        clk.value(1)
        utime.sleep(0.0001)
        clk.value(0)
        wr_data <<= 1
    return

def start():
    global clk,dio
    dio.value(1)
    clk.value(1)
    utime.sleep(0.0001)
    dio.value(0)
    return

def ack():
    global clk,dio
    dy = 0
    clk.value(0)
    utime.sleep(0.0001)
    dio = Pin(dioPin, Pin.IN)
    while(dio.value() == 1):
        utime.sleep(0.0001)
        dy += 1
        if(dy>5000):
            break
    clk.value(1)
    utime.sleep(0.0001)
    clk.value(0)
    dio = Pin(dioPin, Pin.OUT)
    return

def stop():
    global clk,dio
    dio.value(0)
    clk.value(1)
    utime.sleep(0.0001)
    dio.value(1)
    return

def displayBit(bit, num):
    global ADDR_DIS
    if(num > 9 and bit > 4):
        return
    start()
    writeByte(ADDR_DIS)
    ack()
    writeByte(DisplayCommand)
    ack()
    stop()
    start()
    writeByte(DIG[bit-1])
    ack()
    if(DOT[bit-1] == 1):
        writeByte(NUM[num] | 0x80)
    else:
        writeByte(NUM[num])
    ack()
    stop()
    return

def clearBit(bit):
    if(bit > 4):
        return
    start()
    writeByte(ADDR_DIS)
    ack()
    writeByte(DisplayCommand)
    ack()
    stop()
    start()
    writeByte(DIG[bit-1])
    ack()
    writeByte(0x00)
    ack()
    stop()
    return


def setBrightness(b = BRIGHT_TYPICAL):
    global DisplayCommand,brightness
    DisplayCommand = (DisplayCommand & 0x0f)+(b<<4)
    return

def setMode(segment = 0):
    global DisplayCommand
    DisplayCommand = (DisplayCommand & 0xf7)+(segment<<3)
    return

def displayOnOFF(OnOff = 1):
    global DisplayCommand
    DisplayCommand = (DisplayCommand & 0xfe)+OnOff
    return

def displayDot(bit, OnOff):
    if(bit > 4):
        return
    if(OnOff == 1):
        DOT[bit-1] = 1;
    else:
        DOT[bit-1] = 0;
    return

def InitDigitalTube():
    setBrightness(2)
    setMode(0)
    displayOnOFF(1)
    for _ in range(4):
        clearBit(_)
    return

def ShowNum(num): #0~9999
    displayBit(1,num%10)
    if(num < 10):
        clearBit(2)
        clearBit(3)
        clearBit(4)
    if(num > 9 and num < 100):
        displayBit(2,num//10%10)
        clearBit(3)
        clearBit(4)
    if(num > 99 and num < 1000):
        displayBit(2,num//10%10)
        displayBit(3,num//100%10)
        clearBit(4)
    if(num > 999 and num < 10000):
        displayBit(2,num//10%10)
        displayBit(3,num//100%10)
        displayBit(4,num//1000)

pwm_r = PWM(Pin(4))
pwm_g = PWM(Pin(32))
pwm_b = PWM(Pin(33))

pwm_r.freq(1000)
pwm_g.freq(1000)
pwm_b.freq(1000)

def light(red, green, blue):
    pwm_r.duty(red)
    pwm_g.duty(green)
    pwm_b.duty(blue)

#超声波测距,单位:厘米
def getDistance(trigger, echo):
    # 产生10us方波
    trigger.value(0)   #事先给一个短的低电平,以确保一个干净的高脉冲;
    utime.sleep_us(2)
    trigger.value(1)
    utime.sleep_us(10)#拉高后,等待10微秒,立即调低
    trigger.value(0)

    while echo.value() == 0: #建立while循环,检测回波引脚值是否为0,并记录此时的时间
        start = utime.ticks_us()
    while echo.value() == 1: #建立while循环,检查回波引脚值是否为1,并记录此时的时间
        end = utime.ticks_us()
    d = (end - start) * 0.0343 / 2 #声波的传播时间x声速(343.2 m/s, 0.0343 cm/微秒),再除以来回距离2
    return d

### 设置引脚
trigger = Pin(13, Pin.OUT)
echo = Pin(12, Pin.IN)

buzzer = PWM(Pin(2))
def playtone(frequency):
    buzzer.duty(1000)
    buzzer.freq(frequency)

def bequiet():
    buzzer.duty(0)

### 主程序
InitDigitalTube()
while True:
    distance = int(getDistance(trigger, echo))
    ShowNum(distance)
    if distance <= 10:
        playtone(880)
        utime.sleep(0.1)
        bequiet()
        light(1023, 0, 0)
    elif distance <= 20:
        playtone(532)
        utime.sleep(0.2)
        bequiet()
        light(0, 0, 1023)
    else:
        light(0, 1023, 0)
1.5 实验结果
按照接线图正确接好模块,用USB线连接到计算机上电,单击  来执行程序代码。代码开始执行,当超声波传感器检测到障碍物距离范围在10cm 以内时,RGB LED灯亮红色,并将检测到障碍物的距离显示在四位数码管上。同时8002b功放 喇叭模块发出频率较快的声响,起到提示的作用。
当超声波传感器检测到障碍物距离范围在10cm ~ 20cm 以内时,RGB LED灯亮绿色,并将检测到障碍物的距离显示在四位数码管上。同时8002b功放 喇叭模块发出声响,起到提示的作用。
当超声波传感器检测到障碍物距离范围在20cm 以外时,RGB LED灯亮蓝色,并将检测到障碍物的距离显示在四位数码管上。
单击  或按Ctrl+C退出程序。